
Understanding Rock Climbing Difficulty Ratings & the Yosemite Decimal System (YDS)
When climbers discuss climbing roped climbing routes, the difficulty rating of the climb is often considered essential information. The difficulty rating gives a climber an indication of what moves, strength and/or skill the route might involve.
In North America, vertical travel is generally described using the Yosemite Decimal System (YDS). The YDS gives any describes any given hiking, scrambling, or climbing route with a Class. For Class 5 and Class 6 travel, it also includes a Rating.
Let’s start by discussing terrain classes.
Understanding Climbing Terrain Classes
Terrain ratings describe the difficulty of traveling over the Earth. We describe difficulty in terms of:
How easy it is to move forward?
How serious are the consequences of a mistake?

Class 1 hiking trail at Devil’s Lake. These hikers never need to use their hands, and there no real “fall” potential.
First Class Terrain (Class I)
First class terrain requires no special tools or technical skills, beyond walking. Imagine a mostly flat, well-worn trail, that’s easy to negotiate.
First class trails can be paved, gravel, dirt, etc. It’s difficult to fall, and if you do, it’s tough to get very injured. The Grottos trail and the Tumbled Rocks trail are good examples of first class terrain at Devil’s Lake State Park.

The CCC trail has steep, blocky sections of stone steps. Many hikers twist ankles every summer traveling this Class 2 terrain.
Second Class Terrain (Class 2)
Increase the steepness, and you’ve got second class terrain. A hike up a steep trail, maybe using your hands here or there, would qualify. The consequences of a slip-and-fall event increase; it’s easier to sprain or break an ankle or wrist because when you fall, you fall further, and the terrain you fall onto is more irregular (i.e. sharp edges, slick surfaces, poor footing).
Many of the steep, popular hiking trails at Devil’s Lake, like the Balanced Rock, CCC or West Bluff trails, qualify as second class terrain.

Sebastian negotiates a Class 3 talus field at Devil’s Lake State Park. There’s no obvious trail, and he needs his hands often, but the potential fall (and associated consequences) are moderate.
Third Class Terrain (Class 3)
Third class terrain pushes everything up another notch. Forward movement is more difficult; you have to think more about route-finding and you need better movement skills (balance, footwork, sequencing) to move securely. If you slip or fall, the risk of serious injury is higher.
Third class routes are rocky, and most people will use their hands regularly to help make progress and stay balanced. You may consider carrying a rope or taking other additional precautions, such as wearing a helmet. You regularly have opportunities to fall or slide short distances (5 - 15 feet).
Scrambling up or through the talus on the West Bluff, East Bluff, or South Bluff is a good example of third class movement.
Fourth Class Terrain (Class 4)
From reach fourth class terrain, take third class, add exposure (places where you can fall quite a ways), steepness, and make the terrain more challenging.
Since the main danger of fourth class terrain is the lack of security, some climbers will use a rope to protect against long falls.
Fifth Class Terrain (Class 5)
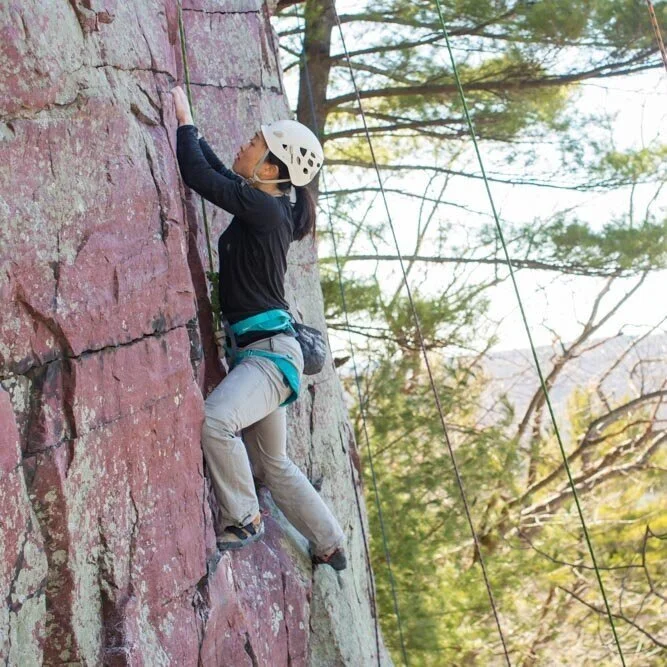
Fifth class terrain typically means a vertical or nearly vertical cliff and significant exposure. Falling will almost certainly lead to serious injury and possibly death. Belaying is recommended, and climbers often use a helmet, harness, and rock climbing shoes to provide additional safety and assistance.
Understanding Subdivisions within Fifth Class climbing
Within fifth class terrain, the YDS breaks difficulty down further using decimal numbers. The scale runs from 5.0 (the easiest roped climbing) up through 5.15, and those numbers tell you a lot about what to expect physically and mentally.
When the system was first developed in the 1950s at Tahquitz Rock in Southern California, the pioneers of the decimal scale considered 5.9 the hardest climb a human being could possibly do without aid. Wikipedia As gear, training methods, and technique evolved, that ceiling was broken, and the scale had to grow with it.
Here is a rough sense of what the grades feel like in practice:
5.0 to 5.6 — Easier fifth class. Holds are generally large and plentiful, and the climbing feels more like a steep ladder than a puzzle. Most beginners work through this range in their first season.
5.7 to 5.9 — The mid-range. Holds get smaller, moves require more deliberate footwork and balance, and the climbing starts to demand real technique rather than just strength. 5.9 is considered a solid, respectable benchmark for recreational climbers.
5.10 to 5.11 — A meaningful jump. Routes in this range require genuine strength, refined movement skills, and the ability to read sequences. Many climbers spend years working through the 5.10 range.
5.12 and above — Expert territory. The climbing becomes highly physical and technical, often involving tiny holds, overhanging walls, and powerful, precise movement. Very few recreational climbers reach this level without dedicated, long-term training.
How the a/b/c/d letters work
By the 1960s, the letters "a," "b," "c," and "d" were added after 5.9 to further refine the levels. The reason was practical: as improved equipment and higher athletic standards allowed climbers to push beyond 5.9, a large number of routes with very different difficulties were all being lumped together at 5.10, leaving the grade nearly meaningless. The letter subdivisions solved that problem.
Within any given decimal grade, "a" is the easiest variant and "d" is the hardest. Thus, 5.10a is noticeably easier than 5.10d, even though they share the same number. This letter system applies from 5.10 onward through the top of the scale.
You may also occasionally see a "+" or "-" used in some guidebooks or climbing gyms in place of letters, simply indicating whether a route sits on the harder or easier end of a grade.
What this means for climbing at Devil's Lake
Devil's Lake routes span the full spectrum of fifth class difficulty, from introductory 5.0s up through hard sport and trad routes in the upper grades. Devil's Lake has a long-standing reputation for sandbagged ratings, meaning the grades here tend to run stiff compared to many other areas. I.e. a 5.8 at Devil's Lake may feel more like a 5.9 or harder at a friendlier crag. Prepare your ego!
When you are new to the area, it is worth climbing a known route or two before drawing conclusions about your grade level at that crag. Fortunately, the rock will set you straight quickly.
Sixth Class (Class 6) - Aid Climbing
Sixth class routes are, by definition, impossible to climb without using equipment to assist you directly. In "free" climbing (which includes everything from 5.0 through 5.15), a climber uses the rock itself for every upward move; ropes and gear are only there to catch a fall. Aid climbing is the opposite. When the rock offers no usable holds — or when the climbing is simply beyond human free-climbing ability — the climber instead places a piece of gear in the rock and pulls or stands directly on that gear to make upward progress.
The most common tool for this is the aider (also called an etrier): a short webbing ladder clipped to each piece of protection. The climber places a piece of gear, clips an aider to it, stands up in the aider's rungs, then reaches as high as possible to place the next piece and hang the next aider from it. The process repeats, one small step at a time, up terrain that would otherwise be unclimbable. It is meticulous, slow work… a single pitch that might take a free climber twenty minutes can consume several hours on aid.
The Aid Rating System: A0 through A5
Aid routes carry their own rating scale, separate from the free-climbing decimal system. This scale runs from A0 (the easiest) to A5 (the most dangerous), and what the numbers primarily measure is not physical difficulty but consequence — specifically, how far and how dangerously you would fall if your gear pulled out.
The "A" prefix indicates that a hammer is required to make placements, typically for placing pitons or copperheads. The "C" prefix is used instead when a pitch can be climbed without a hammer; this is called "clean" aid climbing, and it is the preferred modern style where the rock allows for it. A route rated C2 and one rated A2 are at a similar difficulty level, but the C version leaves no permanent marks on the rock.
Let’s look at what each grade means in practice:
A0 — Just a move or two of aid, often on a fixed bolt or pin already in the rock. Sometimes called "French free." The climber pulls on the gear briefly and moves on. Many otherwise free routes have a single A0 move at the crux.
A1 — Easy aid. All placements are solid and unlikely to pull out. Falling is not a serious concern. Good introduction to aid technique.
A2 — Moderate aid. Placements are generally reliable but can be awkward to find and set. A fall might pull one or two pieces, leading to a fall of around 30 feet, but the landing is expected to be clean.
A3 — Hard aid. Long sequences of marginal placements where the gear may hold only body weight, not a real fall. Fall potential reaches around 15 meters, and a single pitch can require several hours to lead. Requires patience, skill, and careful testing of every placement.
A4 — Serious aid. Long sections where gear holds nothing more than body weight, with fall potentials of 30 meters or more onto ledges below. A fall at A4 carries a real risk of serious injury.
A5 — Extreme aid. Nothing on the entire pitch can be trusted to hold a fall. A leader fall is potentially fatal. Very few routes in the world carry a genuine A5 rating, and routes at this level are only attempted by the most experienced big-wall specialists.
The bigger picture
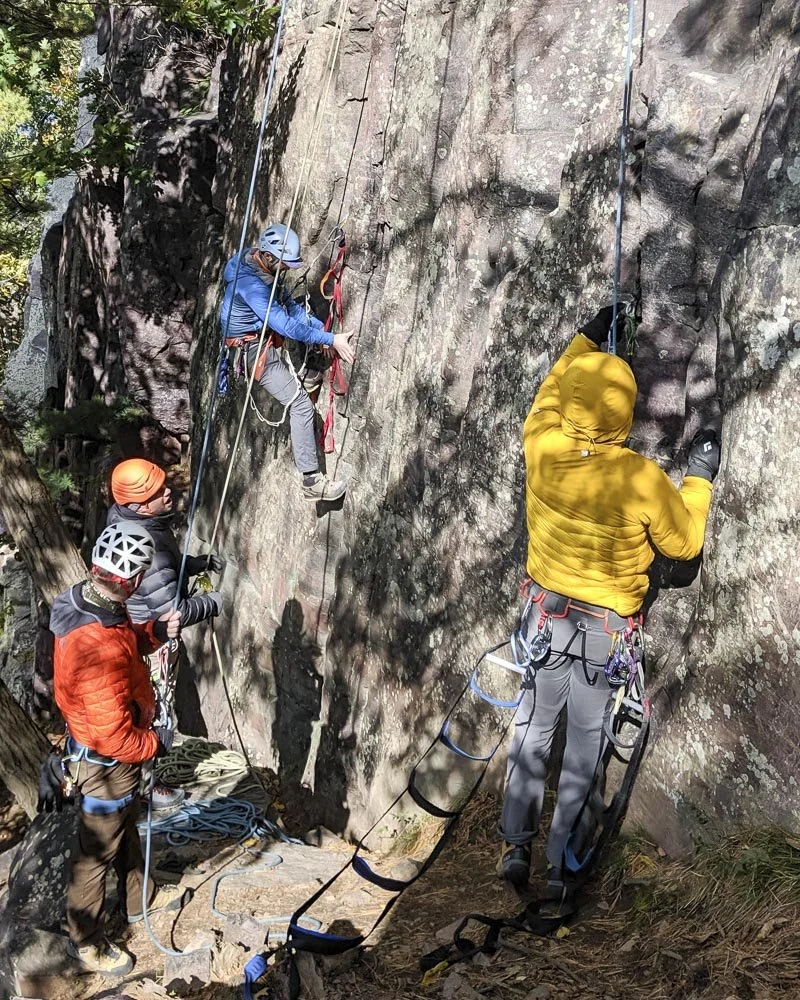
Clinic students practice aid climbing techniques at Birthday Wall.
Aid climbing is most commonly encountered on big wall routes — long, multi-day ascents of massive cliff faces where some sections are simply beyond free-climbing ability. The most famous examples are the big walls of Yosemite Valley, including El Capitan, where routes like The Nose became legendary in the 1950s and ‘60s as aid routes requiring weeks of effort from the pioneers who first climbed them. Over time, as free climbing ability has advanced dramatically, many aid routes have been "freed" (climbed entirely without pulling on gear), a testament to how much rock climbing has evolved.
At Devil's Lake, aid climbing is rare. The crags here are well-suited to free climbing, and you are unlikely to encounter aid ratings on the routes you will find in local guidebooks. Understanding the system, however, is useful background for any climber who eventually ventures to larger walls or begins reading about the history of the sport. And Devil’s Lake certainly offers great opportunities to practice aid techniques, as you prepare for larger objectives elsewhere.
Summary
When you see a climbing difficulty rating, look for its Class and its Rating. Class I and II are not mentioned very often in climbing guidebooks and route descriptions; that sort of terrain will more often simply be called a trail. But route descriptions regularly describe 3rd and 4th Class terrain, particularly during approaches and descents, especially for remote climbing areas and mountaineering objectives. Once you start looking specifically at vertical climbing routes, almost all the discussion will be about the ratings within Class V (ex. 5.8, 5.11a). Once you start seeing capital “A” or “C” in a route description, you’re looking at an aid route (Class VI).