
Static Rope vs Tubular Webbing for Rigging Top Rope Anchors
One of the most common questions students ask during our anchors courses at Devil’s Lake is “What gear should I buy?” And while Dawson has his favorite DMM carabiner, and Scott is happy to get nerdy talking about offset nuts for leading at the Lake, the reality is the vast majority of UIAA rated modern climbing gear is safe and works reasonably well, provided you use it per manufacturer guidelines. However there is one gear topic on which we stand unanimous: We all prefer and recommend static rope over webbing for top rope anchors.
Static Rope
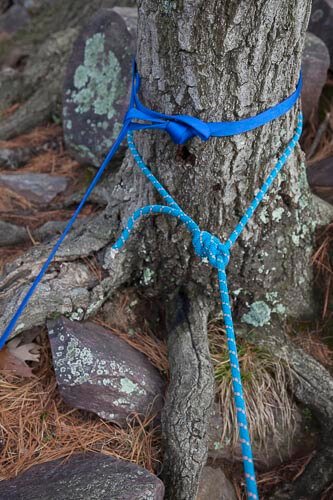
Webbing attached to a tree via girth hitch (above) and static line tied via a bowline knot (below).
Static rope is climbing rope, but with minimal stretch. It has the same kernmantle (core + sheath) construction your dynamic climbing rope has, which means that the strength of the rope – the core – is protected with an abrasion-resistant outer sheath. However, the materials and methods used to manufacture static rope differ, creating a rope with much less stretch. While the static nature of static rope (aka rigging rope) limits it against use in certain contexts, it shines in others.
Without the shock absorption / stretch of a dynamic rope, you should never lead climb on static rope because a large dynamic fall could result in serious injury (since the rope material cannot stretch to absorb the fall force, the climber will). Although falls are shorter and potential impact forces are smaller in top rope climbing, we still use dynamic rope for top-rope climbing. However static materials excel in anchor construction because the lack of stretch keeps the master point fixed and reduces rubbing over edges as the anchor is weighted and unweighted repeatedly.
Manufacturers often refer to static rope as “cord” for diameters of 8.0mm and smaller. We recommend static rope used for climbing anchors be 9.0 to 10.5mm in diameter due to the strength (20+ kN) and ability to use with a belay device like a GriGri. 11mm (7/16ths) and larger diameter static ropes are heavy and cumbersome to knot, while smaller diameter lines (less than 9mm) are weaker and less versatile. 9 - 10.5mm static rope is also the same as most dynamic climbing ropes, thus making our knots look familiar and easier to notice if there is a mistake present.
Webbing
Most UIAA-rated webbing is the 1” tubular variety and has a strength rating of around 18kN. Tubular webbing is a circular nylon “tube” (three dimensional) sewn flat (now two dimensional) for ease of use. Tubular webbing is much stronger than flat webbing (which you might find on the straps of your backpack) due to the extra (doubled) material.
Tubular webbing (green) connected to two pieces of primary protection (right outside frame) provide a clip-in point for a safety tether.
You can also find 5/8" (15mm) tubular webbing rated for climbing purposes, but with a strength rating of around 9kN, this webbing is reserved for tying your own nylon slings and shouldn’t be used in an anchor unless doubled up. The main advantage of webbing is it is significantly cheaper per-foot than the more-difficult-to-manufacture static rope. Below is a comparison of two popular brands:
| Material | Strength | Weight | Cost |
|---|---|---|---|
| BlueWater 1” Tubular Webbing | 17.8kN | 40 g/m | $0.45/ft |
| Sterling HTP 9mm Static Rope | 20.0kN | 62 g/m | $1.30/ft* |
We find the extra cost of static rope is well worth the ease of use, versatility, adjustability and safety compared to tubular webbing.

Attaching a length of static line to a carabiner via an adjustable clove hitch
Ease of Use and Versatility
The flat geometry of webbing limits the knots we can tie with it. Generally all we can do is make a loop in the end with an overhand-on-a-bight, or connect two ends of webbing together with a water knot. (See our knots page.) While you CAN tie a clove hitch in webbing, it’s not easily adjustable. The increased ease of use, versatility and adjustability of static rope comes from the ability to tie a few other key knots and hitches. The tools we frequently use for a static rope include the bowline, “big honking knot” (BHK), and the clove hitch. All of these can be easily untied even after holding many falls.
The BHK knot creates a strong, redundant masterpoint that eliminates the chance to tri-load the masterpoint carabiners, unlike the majority of webbing anchor setups.
Adding a clove hitch at the top of one anchor leg (PICTURE) makes for quick and precise equalization adjustments without having to untie and retie a piece of webbing.
In addition, we can use more advanced knots like the alpine butterfly in the middle of an anchor leg, either to add an attachment point, or to shorten up the leg. As your anchor skills progress, the static line becomes increasingly versatile, but with just a couple of the knots listed above, your anchor setting process can become faster, easier and safer.


Safety
The increased versatility and adjustability static rope provides makes you more likely to set a strong, well-equalized and therefore safer anchor, but static line also provides two specific safety advantages: abrasion resistance and safety tether integration.
Abrasion Resistance
Both 1” webbing and 9.0mm static rope are quite strong (17 to 20kN), but those measurements only describe the maximum breaking strength of the material. Most real-world failures of the material result from abrasion against or along a sharp edge (there are plenty at Devils Lake!). Tests show static rope is about three times stronger than webbing when pulled down over an edge, and vastly superior when pulled along a sharp edge, as would happen if the master point shifted during a traversing climb. Two quotes from the test linked above are particularly helpful:
“Looking at the data, the one thing that stands out as blindingly obvious is that webbing is awful! For a round rope, only a few fibers at a time are exposed to the rock edge, and the rope wears a few fibers at a time. For webbing, almost all the fibers are abraded on every cycle, and it fails very quickly.”
“For rock anchors, if there is any possibility that an anchor could shift when it is loaded, webbing should not be used. If it is used on rock, edges should be well padded.”
Using a GriGri on a static line as a safety tether.
Safety Tether Integration

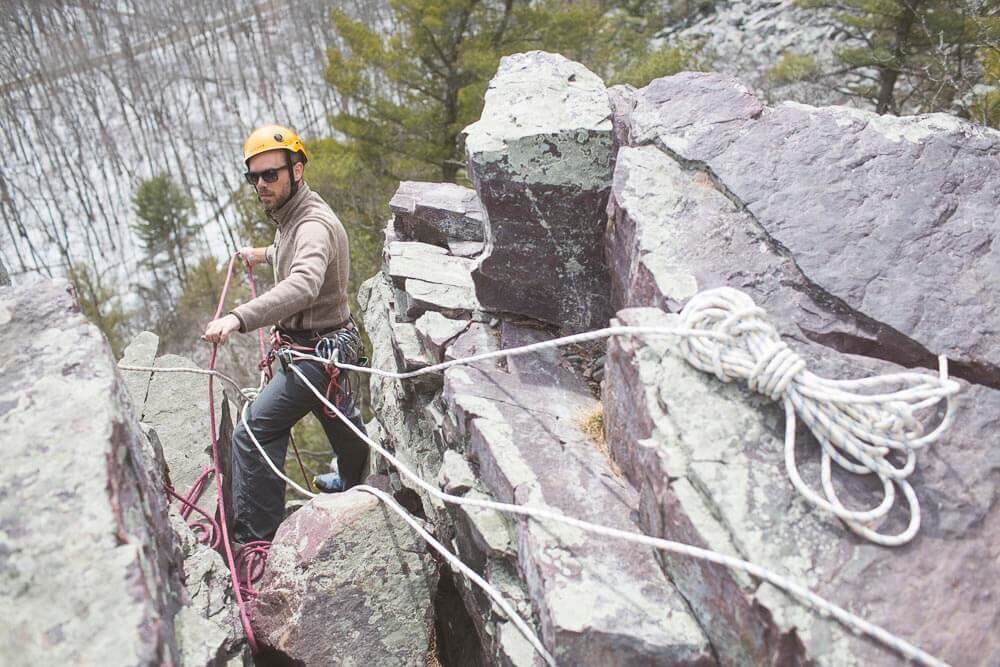
Using a prussik friction hitch as a safety tether while working over the edge.
The second safety advantage of static rope is it allows us to tether ourselves in while working near the edge without extra equipment. Because we are working with a round rope, we can use a friction hitch like a prusik hitch to attach ourselves to an anchor leg with a movable/adjustable tether. We can then work between any primary protection point and the master point (which can be a significant distance).
Additionally, if there is extra static rope in our anchor, we can use it as a separate safety tether (often known as an instructor line due to its use in AMGA curriculum). We can use a prusik hitch or a GriGri on this rope to be attached in as we approach the edge. Regardless of tether technique, there should be a stopper knot on the end of rope the setter is attached to close the system, guaranteeing the rigger cannot fall off the rope’s end.
Minimizing Tree Impact
We should always do our best to lessen our impact on the trees and soil around the tops of anchors. Whether using static rope, webbing or slings, always make sure to wrap and unwrap the tree carefully instead of pull abrading the bark on the tree. Bonus points for padding the tree, or best of all, using rock protection instead of the tree.
Pros and Cons of Static Line versus Webbing
Static rope is more difficult to find/buy than tubular webbing, at least in the lengths useful for top rope anchors at Devils Lake (30-60 feet). Most outdoor shops and websites sell webbing by the foot, but unfortunately they don’t sell static rope this way. Currently the best option is to buy medium length of static rope (for example, 150 feet) and cut it into multiple lengths for multiple anchors or split with a friend.

Webbing tied in an Electrician’s Braid protects static line around sharp rock edges.
Good Uses for Tubular Webbing
We’re not suggesting you throw out all of the webbing you own. Here are three great reasons to keep a length of tubular webbing in your kit:
With 20 feet of webbing, you can make an improvised harness, or “Swiss Seat”, for when your friend who forgot her harness at home.
You can use tubular webbing to extend your static line to that big bomber tree 15 feet back from the edge. (Just make sure that you don’t put it across the trail!)
Webbing also makes for great padding to protect other soft goods from abrasion across a sharp edge (see image).
Conclusion
The safety and efficiency advantages to using static rope for top rope anchors make it an essential piece of your gear kit. Learning to use static line will help you become a more proficient and versatile setter. If you have specific experiences or questions to share, please do below.