Recommended Equipment for Building Top Rope Anchors at Devils Lake
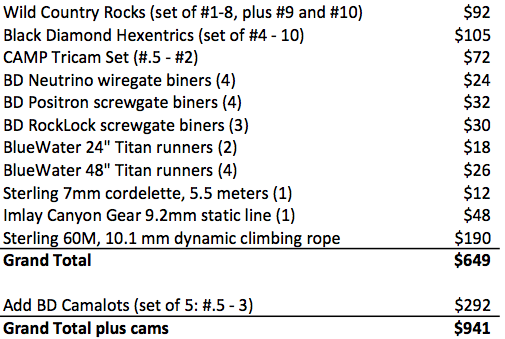
Once clients or friends get the climbing bug, they often ask, "So what gear do I NEED to start building top rope anchors on my own?" The answer to this question is a mouthful, best explained in your local climbing gear shop. But the internet is a pretty good place too, since we can look at lots of gear together, with ample references at our finger tips. If you're going start setting top rope anchors, you'll need four groups of gear:
A rack of protection to build anchor points or "primary protection"
Carabiners to connect hardware (primary protection) to software
Slings and static line (software) to build an anchor system out of the anchor points
A dynamic climbing rope to hang on your anchor
Read on for discussion of these gear groups or head straight to the pricing example.
Protection: Tools We Stick into Cracks
Nuts / Chocks
"Nuts" or "chocks" are generic terms referring to a wide variety of tapered metal chunks, threaded on strong wires, which climbers wedge into cracks for protection. The name "nut" originates from the 1950's & 60's, when British climbers looking for safer ways to climb began wedging machine nuts in cracks to create artificial chockstones with which to sling protection. Eventually, they began drilling out the nuts so they could sling and carry them along as permanent, multi-use tools... and thus, the climbing "rack" was born.
Rocks from Wild Country
Nuts today go by many different names: chocks, stoppers, tapers, rocks, wires, etc. Nuts are available in a variety of materials (aluminum, brass, copper, etc.) and designs (straight, curved, tapered, micro). But most of the variety has to do with situations you are NOT going to find while building top rope anchors at Devil's Lake. Specialized nuts are for awkward or grainy rock, pin scars, and micro cracks that are your only protection option. While you may run into this stuff when you start traveling outside the Midwest, don't worry about that stuff now... Devils Lake is a fairly straightforward climbing area, so your needs are straightforward too.
Your basic Devils Lake nut set should consist of a solid size range of straight or curved aluminum nuts. Wild Country Rocks are a good option with a generous range, as are Black Diamond Stoppers. A set of nuts is going to run you somewhere in the neighborhood of $75 - 100, depending on how many pieces are in the set. Generally, the middle-ish sizes (e.g. #3 thru #7) are the most important/common, while the really small and really big sizes are less frequently called for, which is why many pre-packaged nut "sets" don't include the entire size range of a given line. I recommend buying a nut set, then adding more nuts if/when you feel you don't quite have enough range.
Nut Tool
If you want to keep your nuts, you need a nut tool. Nut tools come in a variety of shapes/sizes, but they are generally thin, firm steel sticks with one hooked end. Nut tools help you dislodge stuck nuts when your fingers either can't reach the nut in question or just aren't strong or rigid enough to do the job. While nut tools mostly help with nut removal, they often help dislodge other hardware (see below) too.
Hexes
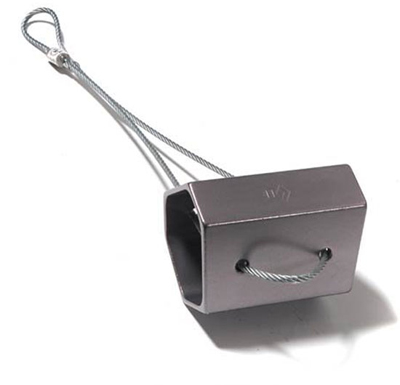
Invented by Yvon Chouinard and Tom Frost in the mid-70s, hexes are a special class of hollow, asymmetric, hexagonal nuts with tapered sides. Like regular nuts, hexes wedge in cracks to create an anchor point. Unlike nuts, however, hexes' six-sided geometry creates 4 possible placement orientations, making for a much more flexible tool. Three of these options allow hexes to "cam" into cracks, rotating to increase friction and holding power. This camming force makes hexes extra-useful in near-parallel cracks, where regular nuts are often ineffective.
Many leaders eschew hexes from their racks, preferring the increased versatility provided by active camming devices (see below). But Devil's Lake quartzite tends to crack in a clean, parallel manner, frequently creating perfect hex placements, and if you're only building top rope anchors you needn't be worried about carrying extra ounces. Plus, dollar-for-dollar, it is much less expensive to build your first rack with hexes (full set for around $100) than cams (5 cams for around $300).
So I think every beginner's Devils Lake rack should include a set of hexes. Choices include flat-sized Black Diamond Hexentrics (11 sizes) or curved-sided Wild Country Rockcentrics (6 sizes), or DMM Torque Nuts (4 sizes). So which is the best for the Lake? Tough choice. Curved designs tend to "bite" the rock better when camming and don't seem to get stuck as easily as Hexentrics. On the other hand, wired hexes (BD) hold up to razor-sharp quartzite edges much better than dyneema slung hexes (WC & DMM), which you might have to pad around edges at the Lake.
Tricams from Camp
TriCams
Perhaps the trickiest gear on this list, C.A.M.P. TriCams are passive camming devices that use camming action to achieve great holding power. Invented by Greg Lowe in the 70s, TriCams are a niche piece of climbing protection, well-loved by those who learn to place them well, but ignored by many climbers who find them difficult to use. TriCams can be placed passively as nuts OR can be "loaded" into a strong camming position by placing the piece in a specific manner.
While spring-loaded camming devices have overshadowed TriCams, they are still light, inexpensive alternatives that perform well in parallel and near-parallel cracks. The large sizes have particularly tremendous range, covering a few cams sizes. If you are trying to save money by avoiding cams for a while, consider adding TriCams to your rack; not only will you learn a lot in mastering their placement, but you will have a lot of fun in the process. If you are on a tight budget, however, pass on TriCams for the moment, as they are the least-essential gear here and have the most specialized use. You can get a set of four TriCams for about $90.
Cams

Ultralight Power Cam from Metolius
The Cadillac of the protection scene, spring-loaded camming devices (SLCDs) empty your wallet while providing the widest flexibility for your placements. Invented by Ray Jardine in 1978, the first commercially viable cams (called Friends) blew the climbing world away by creating safe, strong protection for truly parallel-sided cracks. Cams are now available from MANY different companies, all touting reasons why their variations are the best.
Do you need cams? No. Climbers armed with nuts, hexes, and a good understanding of how to use them can probably set every top rope anchor at Devils Lake. So why are cams so popular?
They are dead sexy. The engineering evident in a cam's mechanics is gorgeous, as is the feeling of pulling a brand-new cam trigger.
Cams seem easier to place. Squeeze, insert, and release. Because cams aren't supposed to "match fit" like passive gear, it's easy to think you don't have to be as picky about their placement.
A cam offers a range of size solutions with each device, versus the one-or-two fixed sizes solved by nuts or hexes. So a set of cams is more efficient than a set of nuts and hexes, in that a fewer number of pieces can solve an equal number of size problems.
If you can afford it, it's nice to have a set of cams on your rack. And if you get into lead climbing, cams will be nearly essential. But there's really no need to rush into buying cams; in fact, you'll be a much better climber and leader in the long run if you start by placing old-school gear, then eventually get into SLCDs.
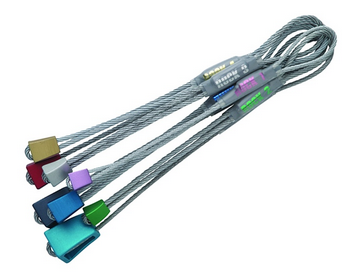
Carabiners: Connecting Hardware to Soft Goods
Even non-climbers are familiar with the ubiquitous carabiner these days, as everyone's mom uses one on their keychain or water bottle. Carabiners are the pawns of the climbing world, used to connect our gear, slings, rope, and harnesses into common systems.
CAMP Photon Wire
Your basic Devil's Lake top rope anchor rack should have at least nine carabiners on it:
3 locking "D" carabiners (from $8 each) - Recommended when laying against rock edges, corners or faces is unavoidable
3 non-lockers ovals or "D"s (from $6 each) - Recommended when the 'biner hangs in the air, not rubbing on anything
3 locking "pearabiners" (from $10 each) - Two for your master point, and one for belaying
This collection should suffice for one reasonably complex top rope anchor set up. If you want enough gear to set up two or more anchors, multiply accordingly.
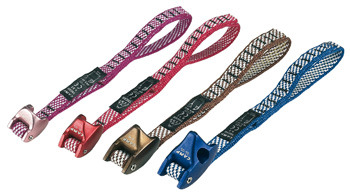
Soft Goods: Creating an Equalized & Redundant System
Slings

BlueWater sewn sling
Sewn slings, also called "runners," are fixed loops of webbing, sewn together with a strong multi-bar tack stitch. Slings are helpful in rigging anchors and connecting gear to your climbing rope while on lead. Slings are like carabiners in that they are inexpensive, multi-purpose, and nice to have in quantity. You CAN make your own slings by tying tubular webbing into circles, but hand-tied slings are heavier, bulkier, and weaker. No need to be cheap here.
I recommend starting off with four slings, two single (24") runners and two double (48") runners, to help with your top rope anchor building. You might get an extra single runner to hang all your gear on, which you can then sling over your shoulder for easy carrying around the clifftops.

7mm cordelettes from Sterling
Cordelettes
"Cordelette" is a fancy French word for a rope tied into a circle or loop. A cordelette is similar to a sling, but made out of 6 - 7 mm accessory cord instead of webbing, and typically much longer. A cordelette can be any length, but 20' - 24' is common, long enough to create an entire three-point anchor in an efficient scenario.
I recommend one cordelette for each anchor you want to be able to build. When your anchor points are close together, you might be able to build an entire anchor system with one cordelette. When your anchor points are further apart, use your cordelette to build one "arm" of your anchor, then connect it to the other arm with your static line.
Static Line

More static line than you need for your top rope anchor!
Static line is the modern substitue for 1" tubular webbing. Stronger and more versatile than webbing, 8 - 10 mm static line is generally the guide-standard choice for connecting your anchor points together. You CAN use webbing for the same purpose (see below) if you want to save money, but clove hitches tied in webbing tedious and difficult to adjust.
I recommend one 100' static line for each anchor you want to be able to build simultaneously. Brand isn't too important here, as long as the rope is UIAA-rated or equivalent, but you are looking for a burly line with a strong sheath that will resist abrasion on rock edges, corners, etc. If you're shopping online, the 9.2mm Canyoneero from Imlay Canyon Gear is a great choice because you can buy by-the-foot at a reasonable price ($.96/ft).
Tubular Webbing
Long a staple of top rope anchors everywhere, tubular webbing is dying a slow, beleaguered death as it gives way to more intelligent rigging techniques using static line. I usually keep a 25' piece of webbing in my pack for slinging a rock or something, but only because I sometimes run out of static line and the webbing stuffs into empty corners of my pack more easily than another static line would.
Rope: The Anchor-to-Climber Connection
Your climbing rope hangs from the master point of your anchor, connecting the climber and belayer to the anchor system. Your rope needs to be strong, but then the UIAA requires every rope in your local gear shop to be strong. So don't worry so much about strength as much as these factors:
Length - I recommend a 60-meter rope for Devil's Lake. A 50-meter rope will handle most routes at the lake, but it's a little short for some areas of the East Rampart, like the Rainy Wednesday Tower or Bill's Buttress. While 70-meter ropes are widely available, it's really more rope than you need here.
Keep in mind that after a season of use, you might need to trim your rope to remove the first 10' or so that gets abused by knotting/weighting each climber, so your rope might get shorter over its lifetime.
Durability - Probably the most important factor for beginning top roping. You want a work-horse rope that will withstand abuse and dirt, not one you need to treat like a glass vase. I have seen plenty of ropes show sheath deterioration (fuzziness, abraded threads, etc.) way too quickly. Unfortunately, there is no "rating" for durability, so do some research to figure out which ropes wear well over time. I have found Sterling ropes to be durable and worth their dollar.
Thickness - We are looking for a balance of durability (thicker rope) and reasonable size/weight (thinner ropes) here. While a really thick 11.2 mm rope will be super burly, it takes up a LOT of room in the pack and weighs a lot each time you haul it up the cliffs. On the other hand, a super-light 9.1 mm rope is really meant for leaders concerned about rope weight while climbing, and these ropes just can't take the wear and tear thicker ropes can. I recommend something in the 9.4 -10.2 mm range.
There are many rope manufacturers out there, and I certainly haven't tried all of them. Choose a brand with long-standing reputation for quality, and you will likely be satisfied.
Bottom Line
Gear prices change constantly and new gear comes out every month. That said, I want to offer a sense of the ballpark cost of a beginner top roping kit for Devils Lake. For simplicity and a degree of consistency, I priced everything out on Amazon, though I always recommend you buy from your local climbing shop, where the prices are likely comparable. Specific brands and products not necessarily recommendations, but gear I have used personally and feel comfortable with. The point here is to give you an IDEA of what your start-up rack may cost you, while your personal decisions will vary.