
6 Steps to Rappelling with a "Third Hand" Backup (Autobloc Hitch)
When I guided canyoneering trips in Zion, I did a lot of rappelling instruction, observing maybe 2,000 rappels each year. Teaching and watching so many repetitions provided insight into common problems beginning rappellers have, and when and how to fix those problems.
One of tool/technique I learned to love was the autobloc hitch, or “third hand.” Tying a third hand (which usually involves an autobloc hitch or a prussik hitch) enables you to easily back-up your rappel so you can release your brake hand whilst rappelling without losing control and/or suffering potentially dire consequences. While the autobloc backup technique used to be fairly controversially, it’s become fairly accepted/supported in the climbing community and is a popular risk management tool.
If you're looking for a good way to back up your rappel and you don't have a partner available for a fireman's belay, an autobloc is a great option. Here's how to set it up:
How to Set Up an Autobloc Backup
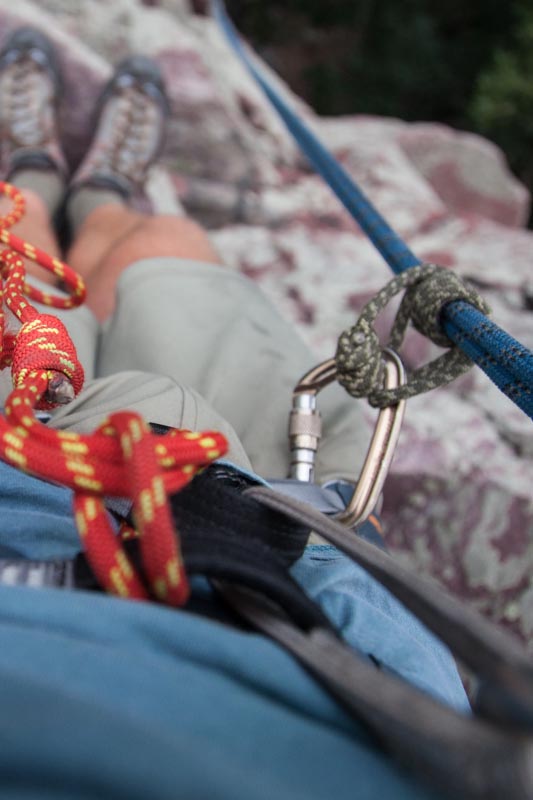
Autobloc back-up hitch attached to harness leg loop
1. Buy or make an friction hitch / autobloc cord. I recommend 6 or 7mm accessory cord, cut to 44" long. A double fisherman's knot with very fairly short tails (10 - 20 millimeters) works best to connect the cord ends into a loop. Sterling makes a nice pre-assembled friction hitch cord out of heat-resistant Technora / Aramid fiber, but it's easy enough to make your own friction hitch out of 6mm accessory cord.
2. Attach the autobloc cord to the leg loop of your harness. Do this via a carabiner (as pictured), or by connecting the cord directly to your leg loop with a girth hitch. If you go the girth hitch route, you'll need a longer cord than you would otherwise. The length of the cord is important: it needs to be long enough to allow for the hitch with some slack, but not so long that it can get sucked up into your rappel device. If the autobloc does get into the rappel device, it can either jam things up so you can't move OR fail as a back-up, letting the rope run free... I have seen both cases in the field.
3. Wrap the autobloc cord around the brake side of your rappel rope. I like to hold the knot while I do this, starting above the rappel rope and wrapping down it, toward the ground. Take care to keep the cord strands untwisted and parallel as you wrap; this will help your hitch move smoothly and avoid unintentional binding during use.
How many wraps do you need? It depends on the thickness of your autobloc cord as well as that of your rappel rope. Generally, the bigger the difference between the two, the fewer wraps you need. You will generally want either three or four wraps; with 6mm cord and most climbing rope thicknesses, either will work. If in doubt, start with four; if the hitch is really sticky or difficult to move, then try three. I highly recommend working out this ratio and "interviewing" the autobloc on a short rappel before trying anything big, so you can work out any kinks and get the hang of the hand work.
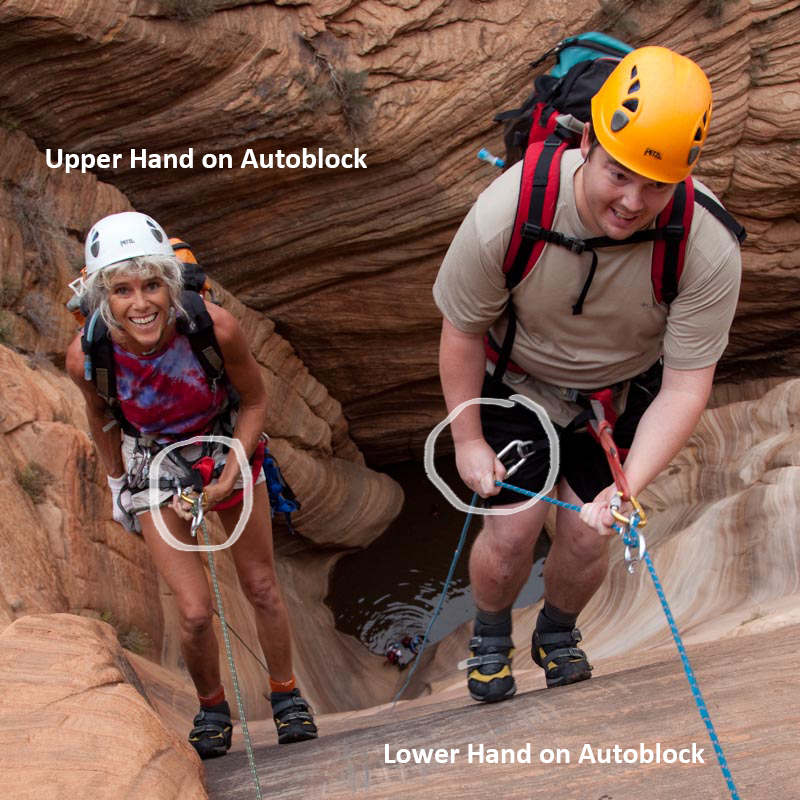
Maria and Jeff rappelling with autoblocks
4. Hold the autobloc back while you rappel. Use two hands below your rappel device, one to control the rope speed and the other for your autobloc. I like to have my left (upper) hand on the autobloc, with my right below it on the rappel rope (as Maria does, above). By squeezing the top of the autobloc with your thumb and first two fingers, you can simultaneously hold back the autobloc so it doesn't bind/catch onto the rappel rope AND control the rope speed by squeezing through the autobloc. The great thing is the heat from the rappel rope is largely absorbed by the autobloc cord, which allows you to rappel quickly without burning your hands.
5. Release the autobloc hitch for a hands-free break in your rappel descent. You can stop yourself at any point with your right hand, OR you can allow the autobloc to bind/catch for a hands-free stop. Use common sense, however; going from a fast rappel to a dead stop will hurt your body. Ease your way into the stop when possible.
6. Release the autobloc hitch to continue descending. A bound autobloc hitch should not be too difficult to slide down. Push the top strands of the autoblock hitch down, away from your rappel device, which releases the stop and allows you to continue rappelling.
Sound complicated? The technique takes many words to explain, but it is straightforward in practice. Again, make sure to practice on a short drop with ample time to explore. If you have questions, clarifications, or tips on how to explain this better, please leave a comment.